
(Parent Theme & Child Theme Guide)
How to Download and Install the SWELL WordPress Theme
(Parent Theme & Child Theme Guide)
After purchasing the SWELL WordPress theme, the next step is to download the theme files and install them on your WordPress website.
- This guide explains:
-
- How to download SWELL after purchase
- The difference between the Parent Theme and Child Theme
- Important precautions
- How to install SWELL on WordPress (step-by-step)
-
This is especially helpful for international users who are new to Japanese WordPress themes.
Step 1 – Download SWELL After Purchase
After completing your purchase, you will receive access to the SWELL download page.
- From your purchase account or confirmation email:
-
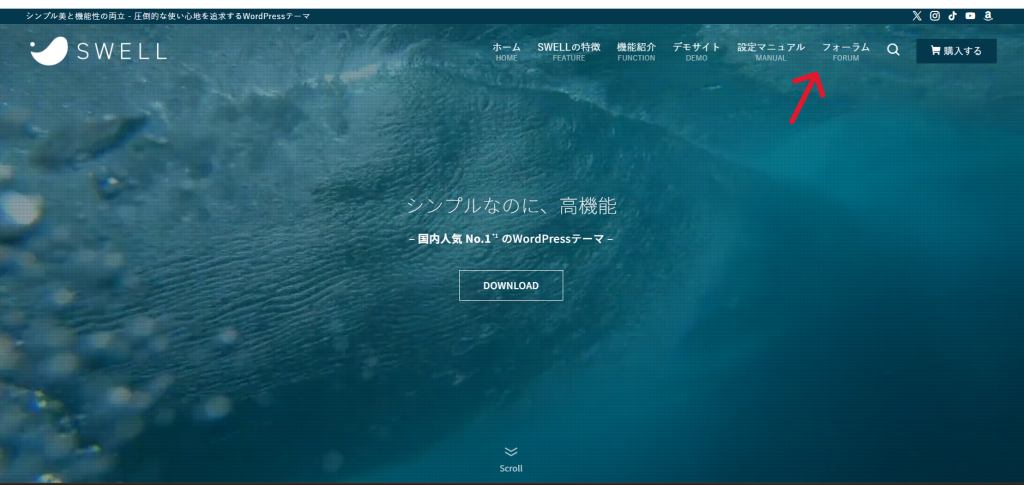
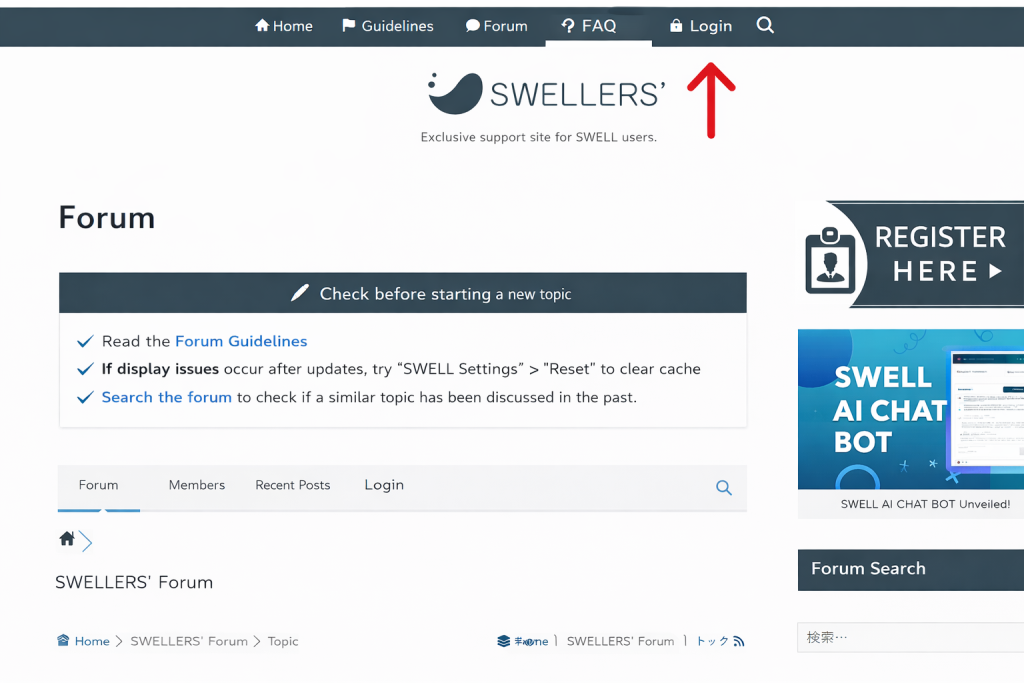
- Log in to your SWELL account page
(For the easiest access, tap “Forum” from the homepage and log in there.) - Go to the download section
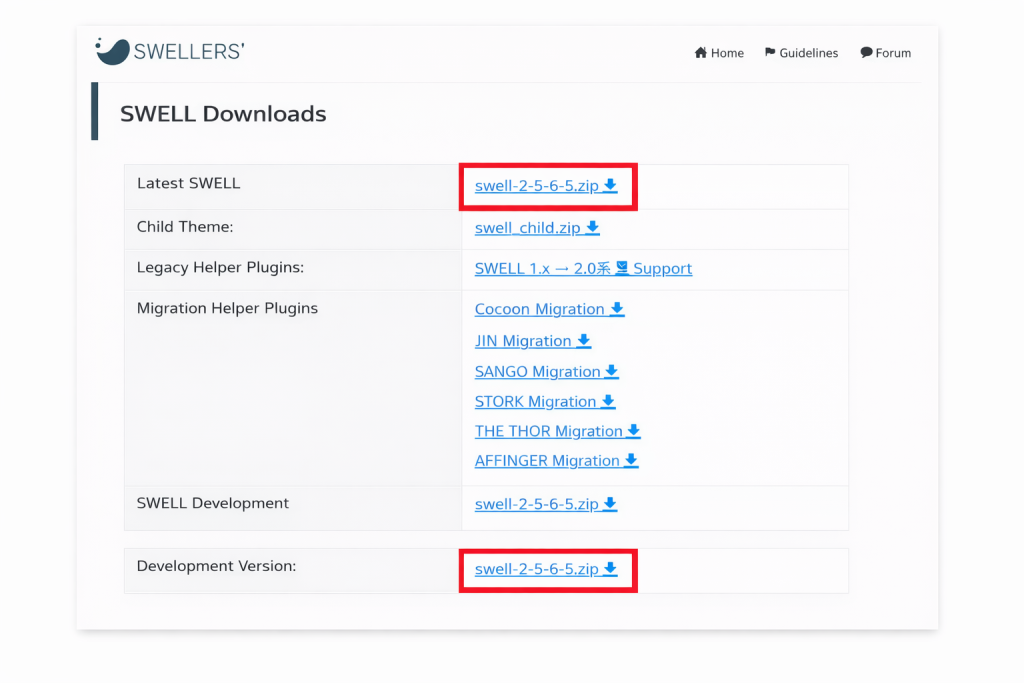
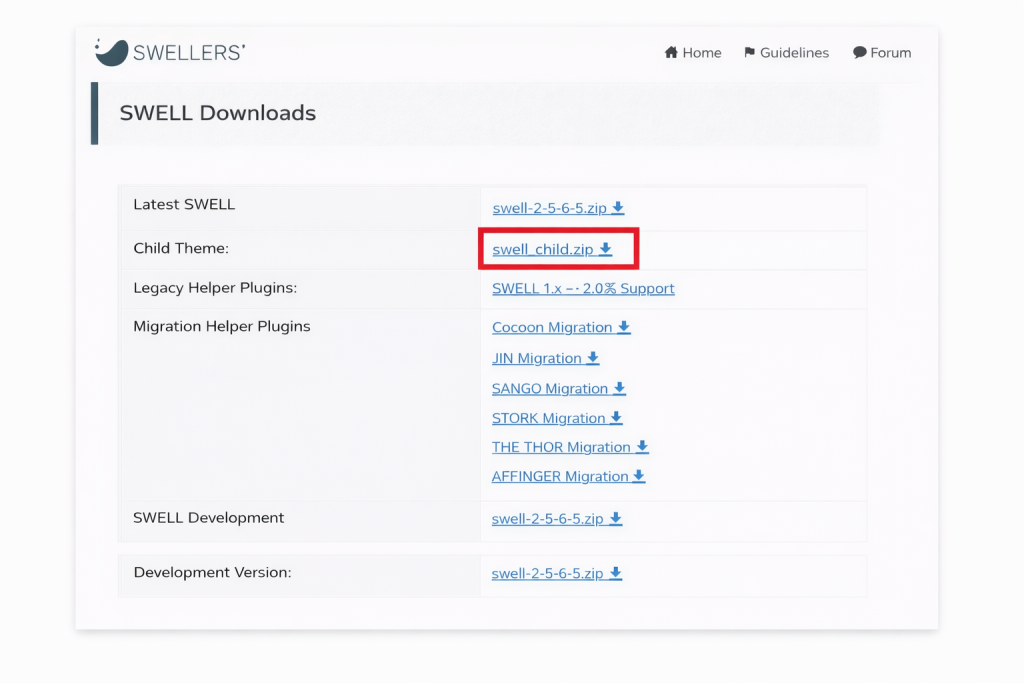
(After entering your My Page, scroll down the page until you reach Step 3, “Download the following files.”) - Download the following files:
- SWELL Parent Theme
- SWELL Child Theme
You will usually receive two separate ZIP files.
- Log in to your SWELL account page
-
- (For the easiest access, tap “Forum” from the homepage and log in there.)

- Log in to your SWELL account page
- Download the following files:
SWELL Parent Theme
- Download the following files:
SWELL Child Theme
Step 2 – Parent Theme vs Child Theme (Important)
Step 2 – Parent Theme vs Child Theme (Important)
- Parent Theme (SWELL)
-
- This is the main SWELL theme
- Contains all core features and design
- Required for SWELL to work
- Child Theme (SWELL Child)
-
- Used for customization
- Safe place to add custom CSS, PHP, or functions
- Prevents your changes from being lost during updates
✅ Best Practice (Strongly Recommended)
- Always install both:
-
- Parent Theme → Required
- Child Theme → For safe customization
Important Notes Before Installation
- ⚠ Do NOT unzip the theme files
-
- Upload the ZIP files as they are
- Do NOT extract them on your computer before uploading
- ⚠ Do NOT modify the Parent Theme directly
-
- Custom code should go in the Child Theme
- Editing the Parent Theme may cause you to lose changes during updates
- ⚠ Make sure your environment meets requirements
-
- PHP 7.3 or higher
- WordPress 5.9 or higher (recommended: latest)
Step 3 – Install SWELL on WordPress
Now, install the theme in your WordPress admin panel.
Go to:
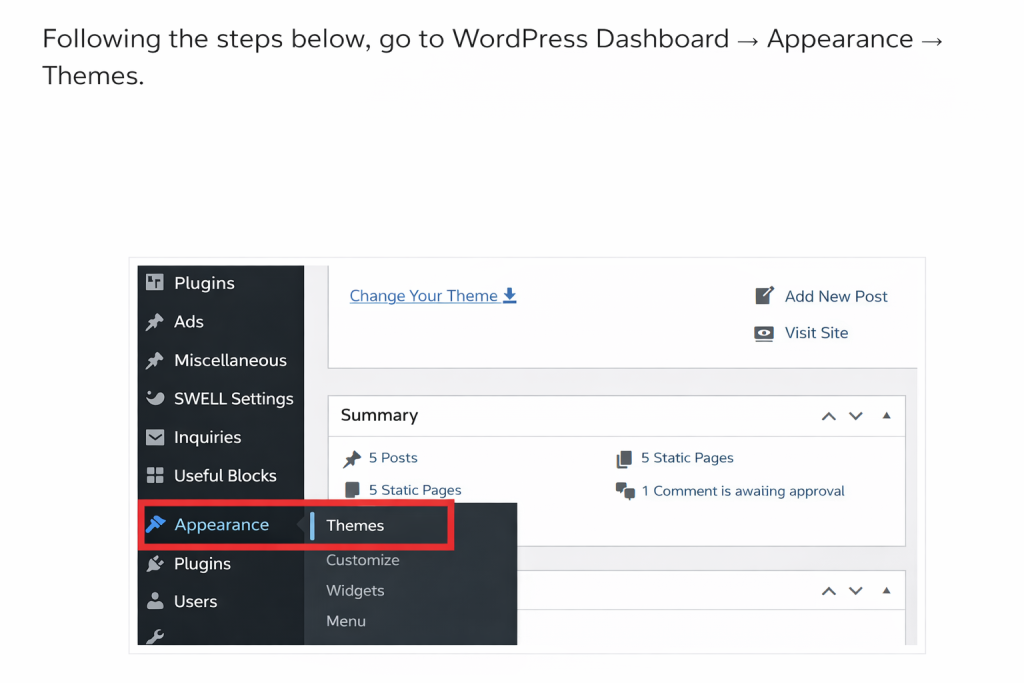
- Appearance → Themes →
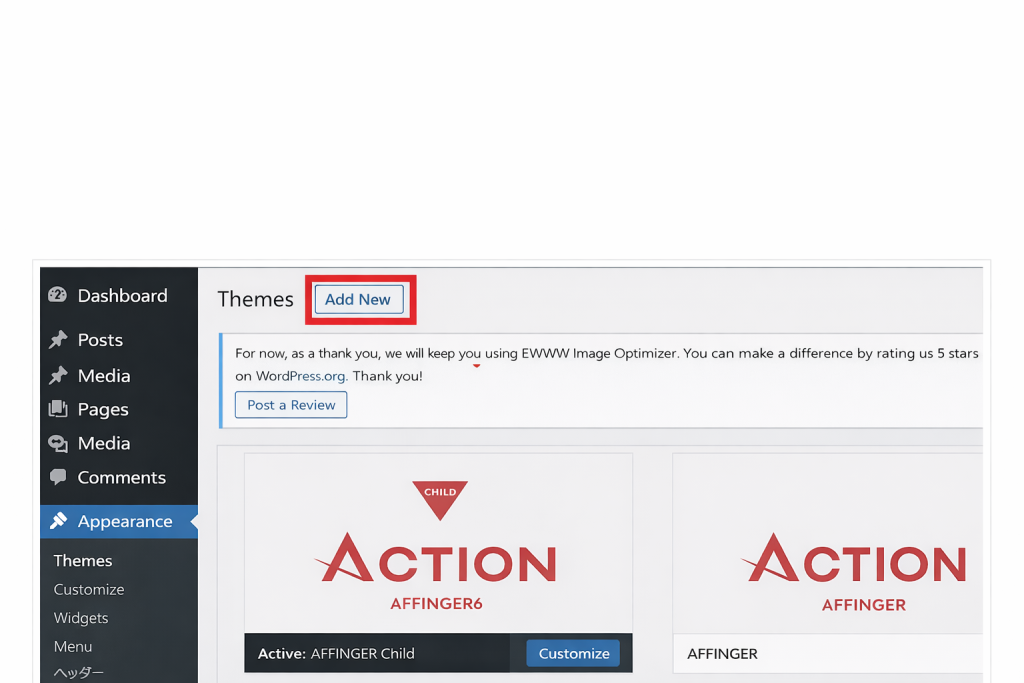
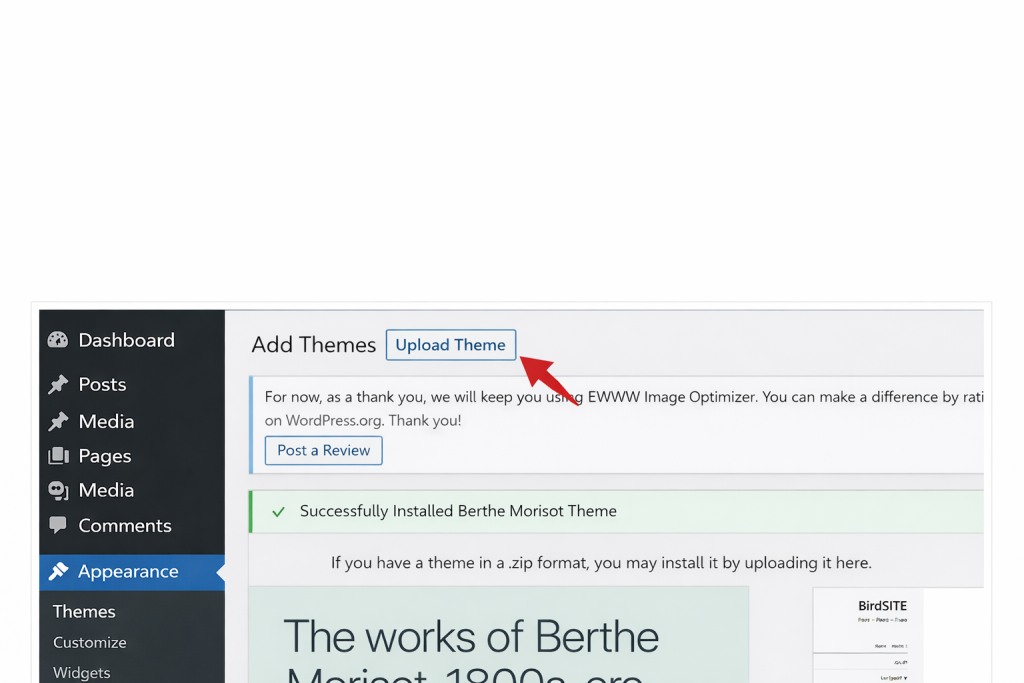
- Add New → Upload Theme →
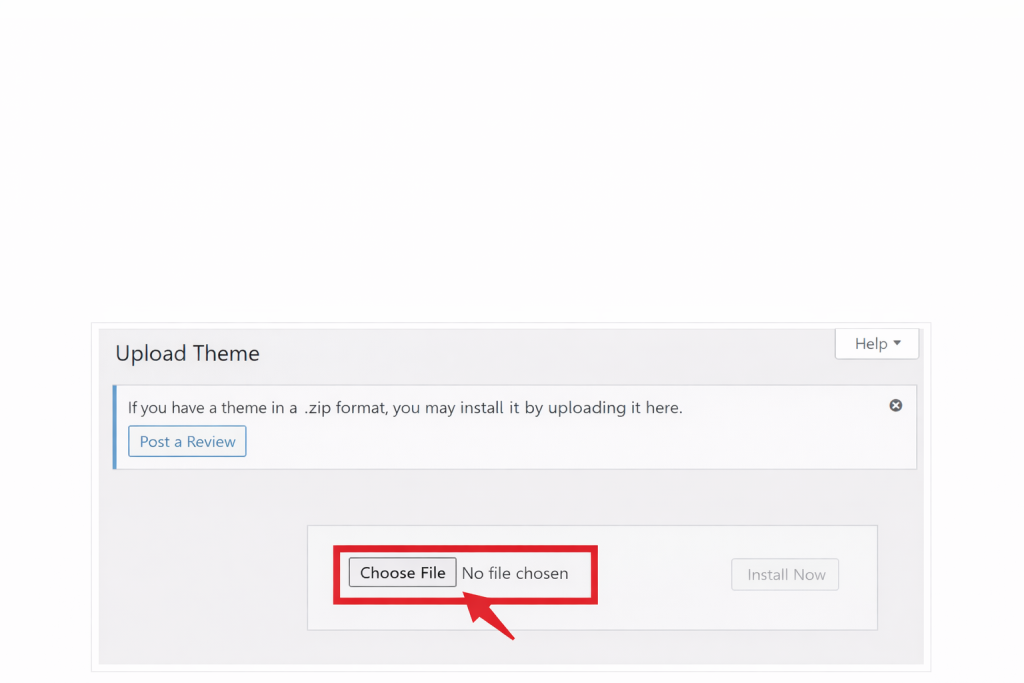
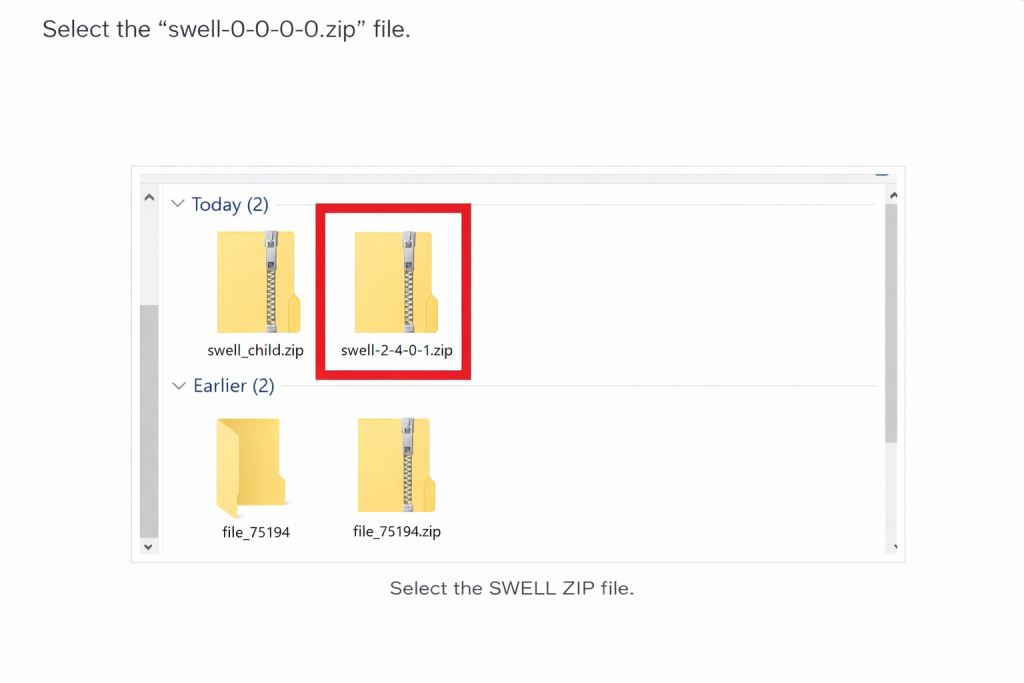
- Click “Choose File”
- Click Choose File
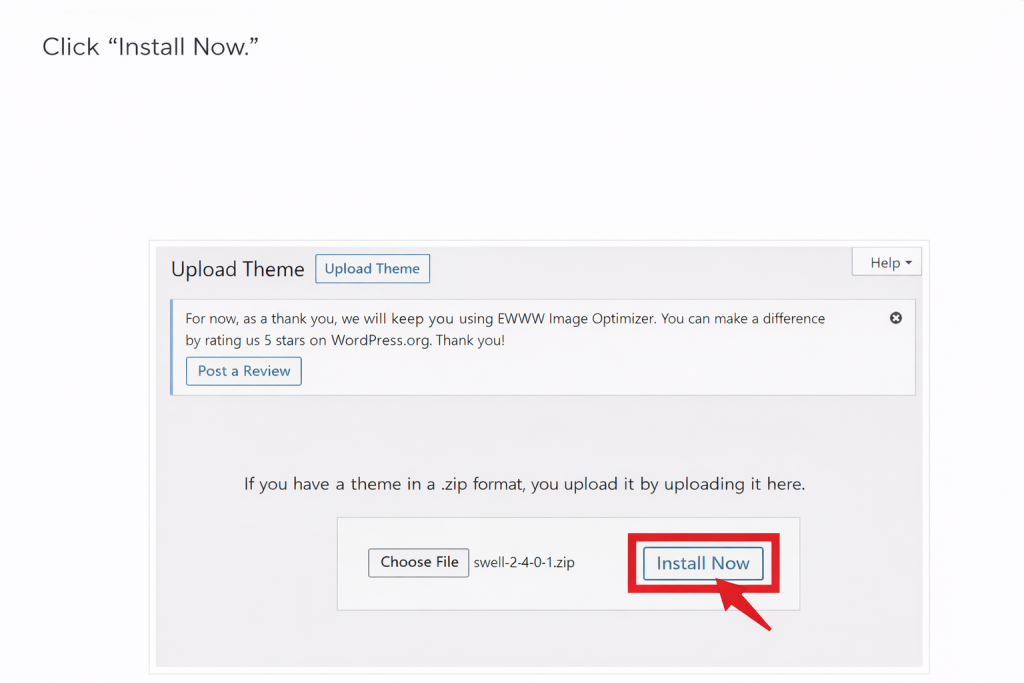
- Select the SWELL Parent Theme ZIP file
- Click Install Now
- After installation, click Activate
✅ The Parent Theme must be installed first.
- Click Choose File
- Select the SWELL Parent Theme ZIP file
- Click Install Now
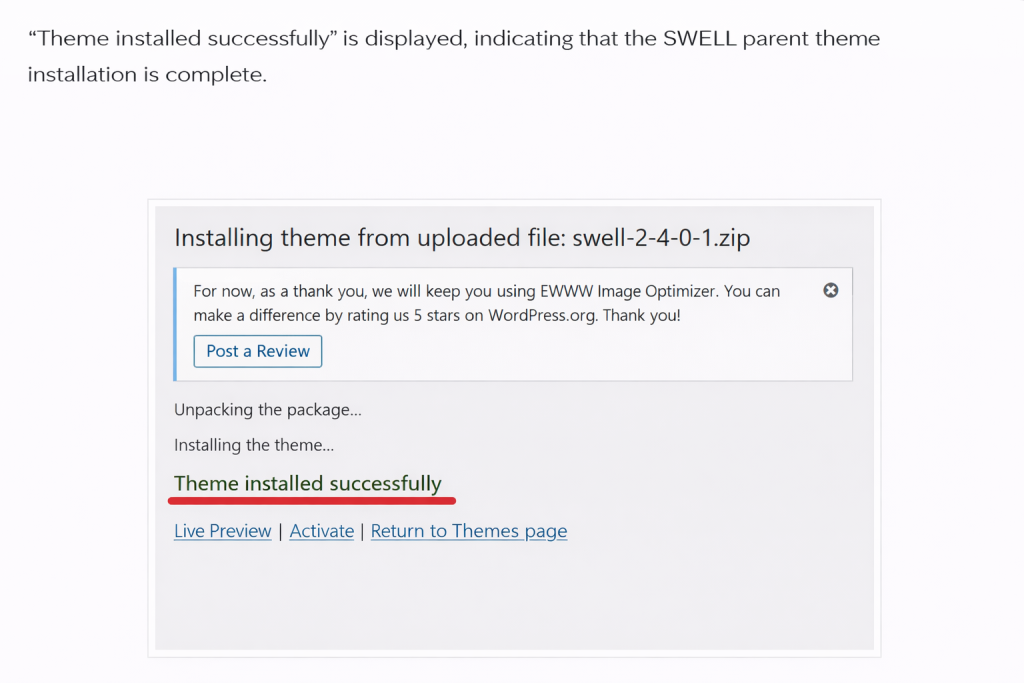
👉 The SWELL parent theme has been successfully installed. Let’s continue by installing the child theme.
Repeat the same steps:
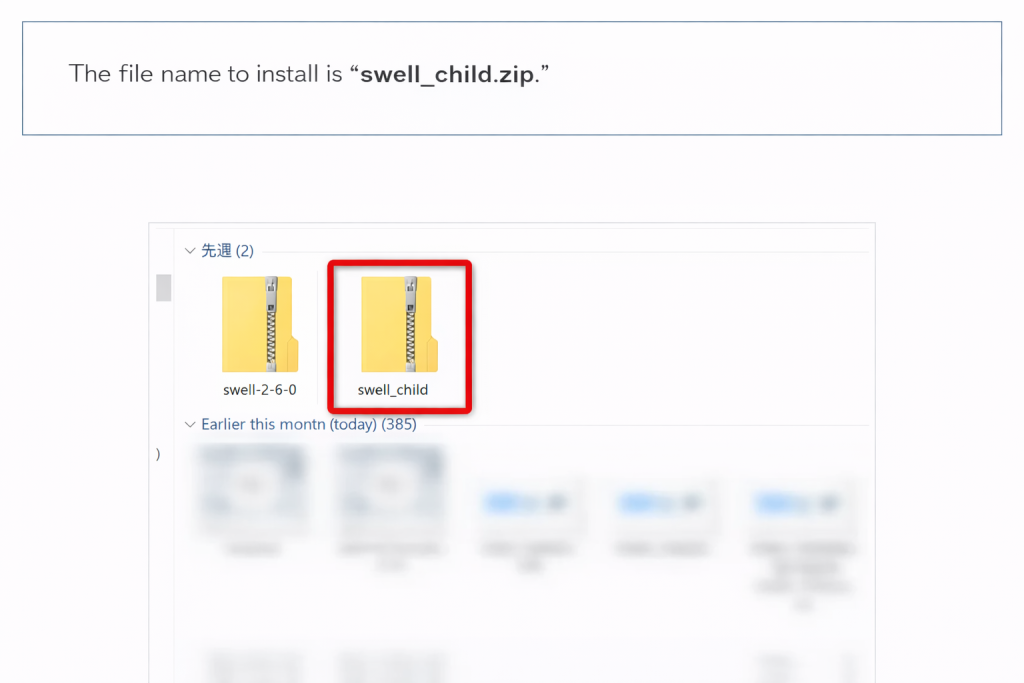
- Click Upload Theme again
- Select the SWELL Child Theme ZIP file
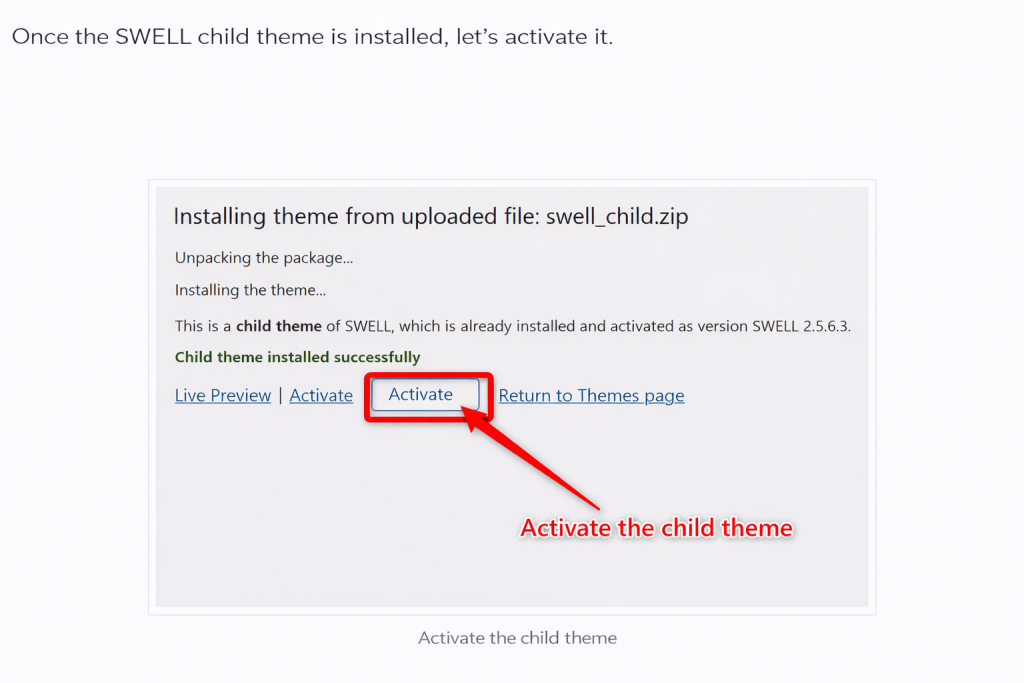
- Click Install Now
- Click Activate
✅ After this, the Child Theme should be the active theme.
👉 Once the SWELL child theme is installed, activate it.
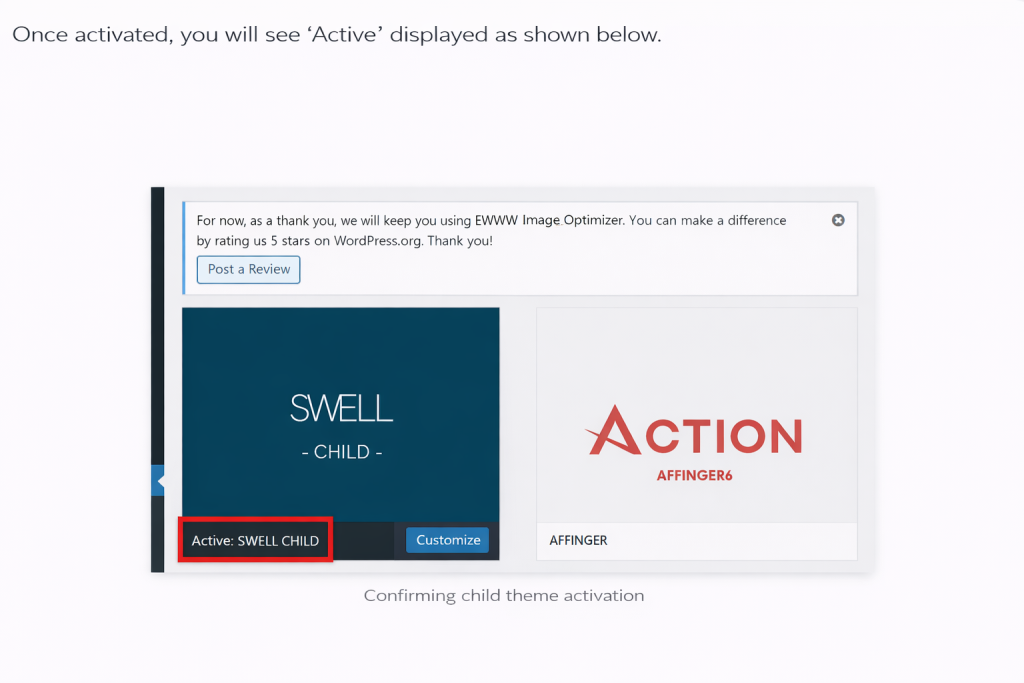
👉 Once activated, it will be displayed as “Active,” as shown below.
👉 That’s it — the SWELL installation is now complete.
Step 4 – Confirm Successful Installation
Go to:
Appearance → Themes
- You should see:
-
- SWELL (Parent Theme)
- SWELL Child (Active)
-
If SWELL Child is active, installation is complete.
Common Mistakes (And How to Avoid Them)
- Only installing the Parent Theme
→ Always install the Child Theme too
- Editing the Parent Theme
→ Use the Child Theme for custom code
- Uploading extracted folders
→ Upload ZIP files only
- Using WordPress.com
→ SWELL works only on self-hosted WordPress.org
What to Do Next
- After installing SWELL, we recommend:
-
- Importing demo data (if available)
- Setting basic theme options
- Reading beginner setup guides
- Installing recommended plugins
FAQ for International Users
- Can I use SWELL on multiple websites?
-
Yes. SWELL is 100% GPL licensed and can be used on multiple sites.
- Do I need the Child Theme?
-
Yes. It is strongly recommended for safe customization.
- Can I update SWELL later?
-
Yes. You can update the Parent Theme while keeping your customizations in the Child Theme.
Summary
-
- Download both Parent and Child Themes
- Install Parent Theme first
- Install and activate Child Theme
- Use Child Theme for customization
- Keep ZIP files zipped when uploading
コメント